Flood Fill Tool
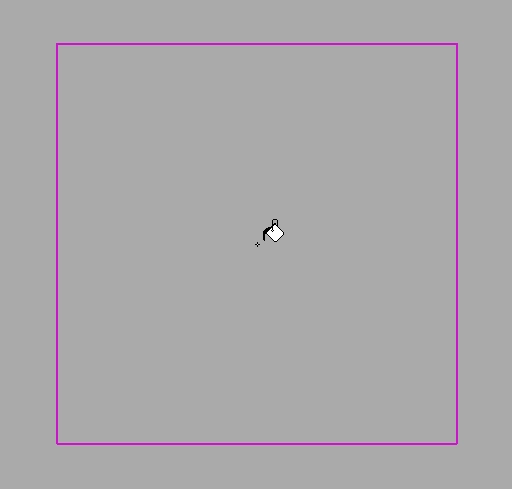
Drawpile’s Flood Fill tool, also sometimes called fill bucket or similar, lets you fill areas in a single go. You can select the Flood Fill tool through Tools → Flood fill. The default shortcut is F.
To apply the fill, left-click with it. To cancel it if it’s taking too long, either right-click or hit the cancel action key (Escape by default.) You can also hold down the click and drag the cursor left and right to adjust the tolerance.
Tool Settings
The flood fill tool has several important settings. They appear in the same place as e.g. your brush settings do when you have the brush or eraser selected.
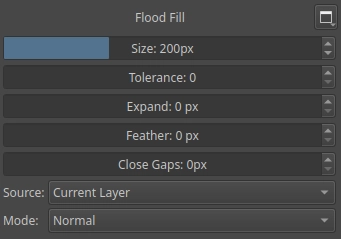
Size Limit
The size limit lets you limit the area that the fill tool applies to, which can make the fill run faster. You can also make a selection instead and constrain the fill tool area that way.
As of Drawpile 2.2.2, the size limit is no longer necessary to avoid “flashbanging” other people, so the default is set to unlimited. See the Preview section below.
You can adjust the size limit by using the slider in the tool settings or by using the same shortcuts that you use to change your brush size ([ and ] by default, or Shift + Left Click and dragging left and right, or Shift + Middle Click and dragging up and down.) Either make the size limit large enough to encompass the entire area you want to fill or do multiple separate fills. Using the latter technique also makes it easier to find holes in your lines.
Opacity
How opaque or transparent the fill should be. 100% means fully opaque (the default).
Tolerance
The tolerance decides how close a color in the source image needs to be to get filled. Zero means that the color needs to match exactly, higher values increase the distance. When you fill a transparent area, the tolerance is based on opacity.
You can quickly adust the tolerance for a fill until you find the correct amount by clicking and holding down the button, then dragging the cursor left and right.
Expand/Shrink
This setting decides how many pixels the fill should be expanded after applying it. You can use this to grow the fill into the surrounding lines or shrink it away from them.
The drop-down buttons to the right of the slider let you switch between Expand and Shrink. You can also change the shape between a round and square expansion, the latter is useful for pixel art (and is slightly faster.)
Setting larger expand or shrink values can be slow.
Feather
Feathering blurs the fill. This smoothes out the edges, rather than having them be hard pixels. Feathering is applied after expansion or shrinking.
Large feather values may take a while to process.
Close Gaps
Also known as line detection or sandbagging. This will attempt to compensate for gaps in your lines to prevent spills.
At the time of writing, Drawpile’s algorithm for gap closing is pretty simplistic. Especially larger values will have trouble filling into small corners and crannies. However, it may still be faster to fix up those obvious little corners than hunting for difficult to spot gaps in your lines.
Large gap close values can take a while to process.
Source
This determines what the fill tool bases its fill area on.
- Merged image (the two arrows) will use the entire image as the source.
- Merged without background (the singular arrow) will use the entire image, but disregard the canvas background.
- Current layer (the three layers) will use the currently-selected layer. This is the default.
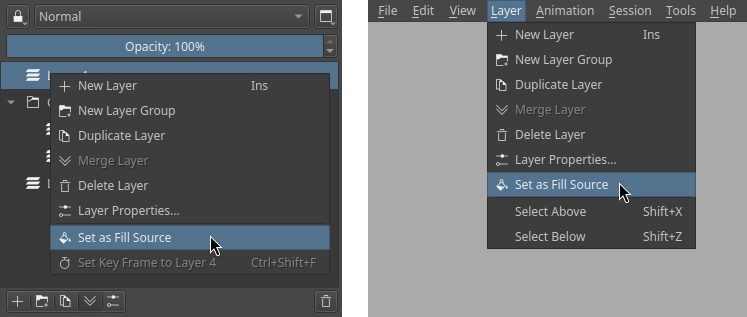
- Fill source layer (the two tags) will use the layer or group you set as the fill source. This will automatically be selected when you set a fill source and is only visible when one is present.
To set or clear the fill source, right-click on a layer or use the Layer menu at the top of the main window.
Mode
The first three buttons let you pick how you want the tool to behave in general:
- Fill continuous area (the bucket) will fill a connected area of a similar color or transparency. This is the default.
- Fill similar colors (the eyedropper) will fill all areas of similar color or transparency, even when they’re not connected. Be careful when working on shared layers, since you may be changing someone else’s stuff outside of your view! Consider setting a size limit or constraining your fill tool area with a selection for this.
- Fill entire slection (the dotted rectangle) will fill the selection, regardless of tolerance. You need to select an area for this to do anything.
Next to that is the blend mode that the tool uses. These work like they do for brushes. The default is Normal.
Preview
To avoid spilled fills spreading across the entire canvas and “flashbanging” other people, the fill tool will preview fills only visible to you at first. When you’re looking at a preview, the cursor will have a checkmark on it and the Apply and Cancel buttons will be enabled.
To abort a fill, you can either undo, right-click, press the Cancel button or hit the “cancel action” shortcut (Escape by default). This will get rid of the preview and no one else will have seen your fill.
To apply a fill, you usally don’t need to do anything. When you make another fill or switch to a different tool, the fill will become visible for everyone automatically. If you want to do it manually, you can press the Apply button or hit the “finish action” shortcut (Return/Enter by default). The hamburger menu at the top-left of the fill settings also gives you the option to confirm fills with a second left-click, rather than it immediately starting another fill.
Editing
The hamburger menu at the top-left gives you the option to enable editing pending fills. This will make it so that you can modify your fill while it’s previewing.
In addition to letting you adjust any of the fill settings, you can also change the color of your fill or select a different layer to apply the fill on.