Dev Update: Week 4 and 5 of 2026
February 2, 2026
The last two weeks have mostly been more work on the project file format, adding support for project statistics and creating timelapses from them. You can try it out in the alpha release.
Project Features
For the following features, you have to enable autosaving and save your project as a dppr file for this to work! Currently, autosaving is still disabled by default, since there isn’t any limits in place yet and idling around in an online session could lead to very large autosave files.
To enable autosave, use the options in Edit → Preferences → Files. You can also enable autosave for the current session via File → Autosave.
Statistics
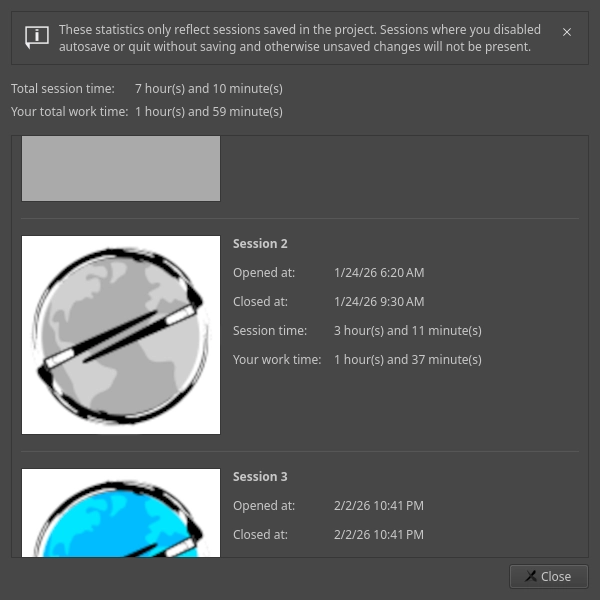
You can view statistics on drawing sessions and times thereof saved in a project file via File → Project Statistics.
This dialog shows you the drawing sessions you’ve had on the project, as well as the times thereof. The open time is when you opened the file and the close time is when you last saved it.
The more interesting time is the work time though, this shows you how much time you’ve actually spent working on the picture, not just having it open. These times are based on the commands stored in the file, measured at a granularity of one minute. This gives a pretty accurate idea of how long it actually took you to draw something, which is useful for setting commission rates or figuring out how much time you ended up procrastinating with Drawpile just being open.
There could probably be more switches for these statistics here, but I couldn’t think of any useful ones yet. If you have ideas, let me know.
Timelapses
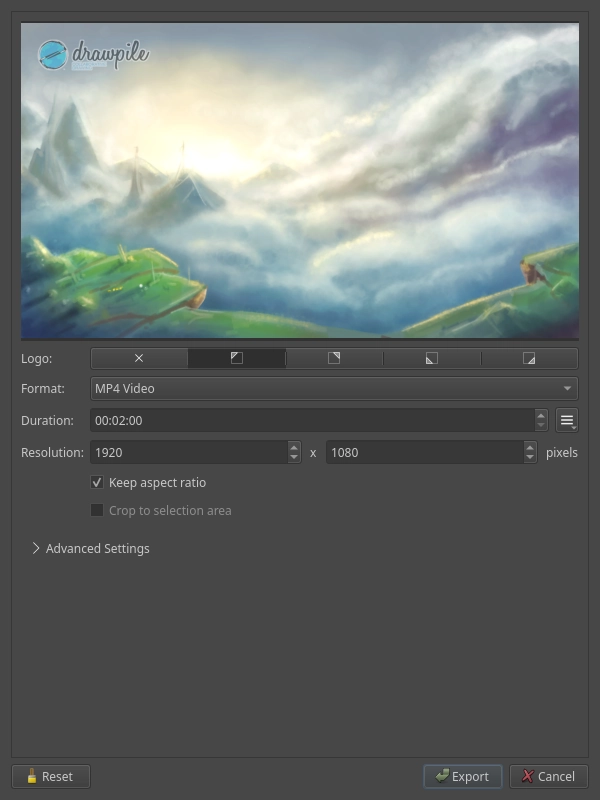
You can now generate timelapses of your drawing process (sometimes incorrectly called “speedpaints”) out of project files without having to manually record them or use a separate command-line tool to generate them. The dialog is under File → Make Timelapse.
Here you can configure the size and duration of the timelapse, as well as where you want the Drawpile logo to go, if anywhere. Behind the advanced settings foldout there’s a lot more knobs you can twiddle if you really want to. If you select an area before opening the dialog, the timelapse will be cropped to the selection bounds. Drawpile does its best to keep the cropped area consistent in the face of canvas resizes.
Currently, MP4 and WEBM videos are supported output formats. Exporting a series of PNGs and JPEGs would probably also be nice, especially for cases where you want to do something more complicated with the timelapse and throw it into a video editor.
It also doesn’t yet integrate with the existing recording formats in any way, the reason being mostly that those are just missing all the timing and cropping information that makes timelapses work sensibly. The way to integrate them would be to let you combine multiple dppr project and dprec/dptxt recording files into a single dppr file and then generate a timelapse from that, rather than complicating this dialog by letting you pick multiple input files or something.
Canvas Shortcut Actions
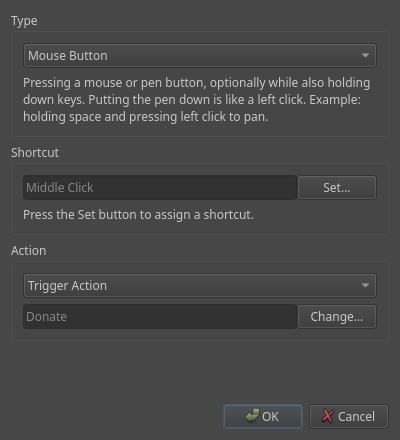
You can now assign canvas shortcuts to trigger action shortcuts. For example, you can make your stylus button switch to the eraser or undo or do whatever other action.
The Settings are under Edit → Preferences → Shortcuts, in the Canvas tab. Here you can choose from some common predefined actions, like eraser toggling or undo/redo. If that’s not what you’re looking for, you can also pick “Trigger Action” and choose any other kind of action.
This was suggested by RubySnoot and SOLARIS.
Minor Additions and Bugfixes
Previews for editable fills now correctly switch to the layer you select, rather than appearing to be stuck on the original layer and then applying to the selected one.
The wonky an slow animations for rearranging docks and toolbars are now disabled. This makes rearranging the UI feel much better I think.